How to Create Stunning Architecture and Interior Design Images with Midjourney and DALL·E and Stable Diffusion: A Comprehensive Guide
In the dynamic world of architecture and interior design, visualization plays a crucial role in expressing ideas, concepts, and the designers vision. Traditional methods such as drafting and 3D modeling are now being augmented with innovative tools like Midjourney and DALL·E. These tools leverage artificial intelligence to produce breathtaking images. This article aims to guide you through understanding the differences between 3d renderings and AI-generated images, setting up accounts on AI image generation platforms, crafting effective prompts, and evaluating the pros and cons of each tool. Additionally, we’ll explore how AI imagery can assist in ideation, design development and product design.
Article Outline
- Renderings Vs AI Images
- Descriptions of MidJourney, Dall-e & Stable Diffusion
- How to Use Each Platforms
- How to Craft a Prompt
- Platform Onboarding
- How to Set Up Accounts
- 10 Ways to Use AI Images
- Ethics when using AI
- The Future
To create CONCEPT IMAGES You’ll need to use an image generator like MidJourney or DallE.
To create an AI RENDERED IMAGE OF YOUR DESIGN you’ll need a program like Stable Diffusion.
Understanding Renderings vs. AI-Generated Images
Renderings are detailed visualizations created with 3D modeling and specialized rendering software, offering precise control over architecture, furnishings, materials, lighting, and camera angles. They are created from actual floor plans and spec sheets, and rooted in real-world physics to accurately simulate spaces.
AI-Generated Images, on the other hand, are produced by algorithms trained on vast datasets of images. These tools interpret textual prompts to create visuals that can range from photorealistic to highly stylized, depending on the input. AI images can not (yet) accurately depict a real space or actual design. Instead, they offer conceptual images that can be used as inspiration, marketing material or ideation.
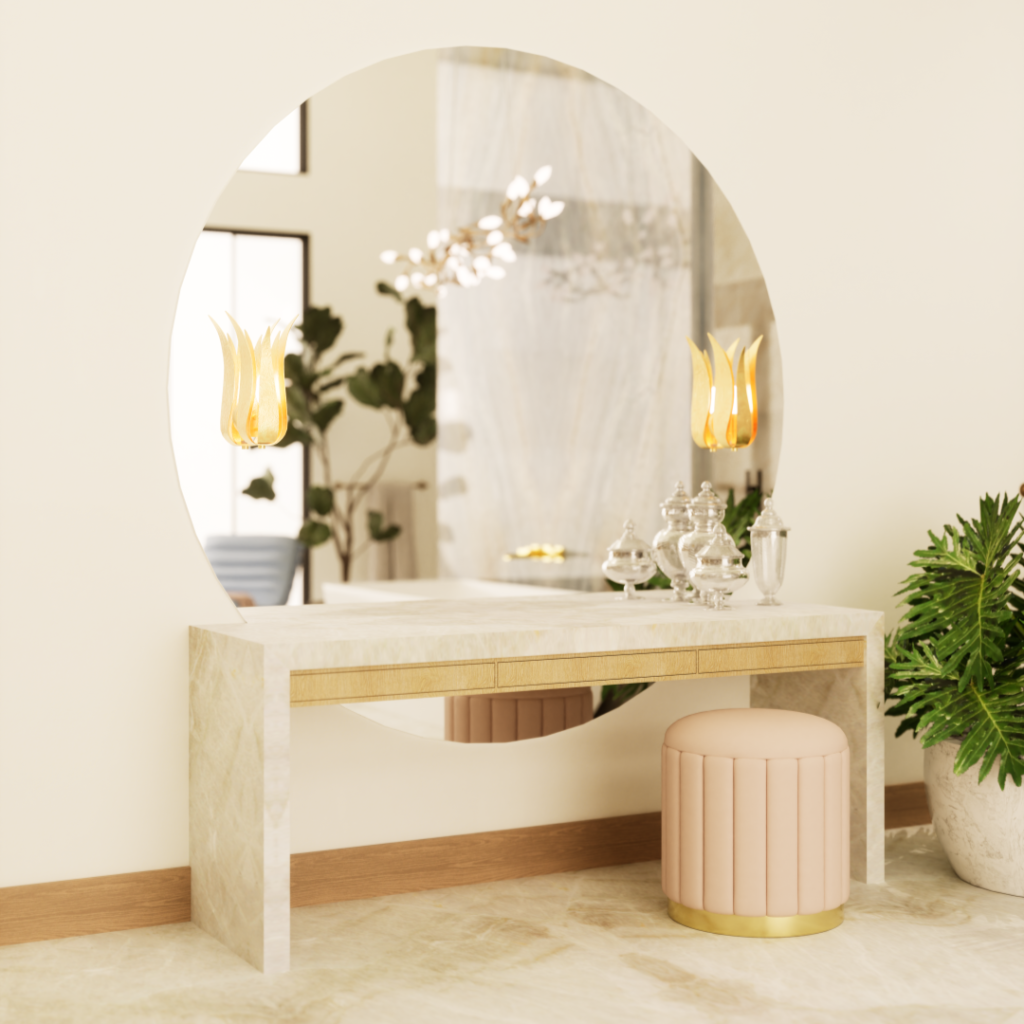
A RENDERING created with 3d models according to exact specifications.
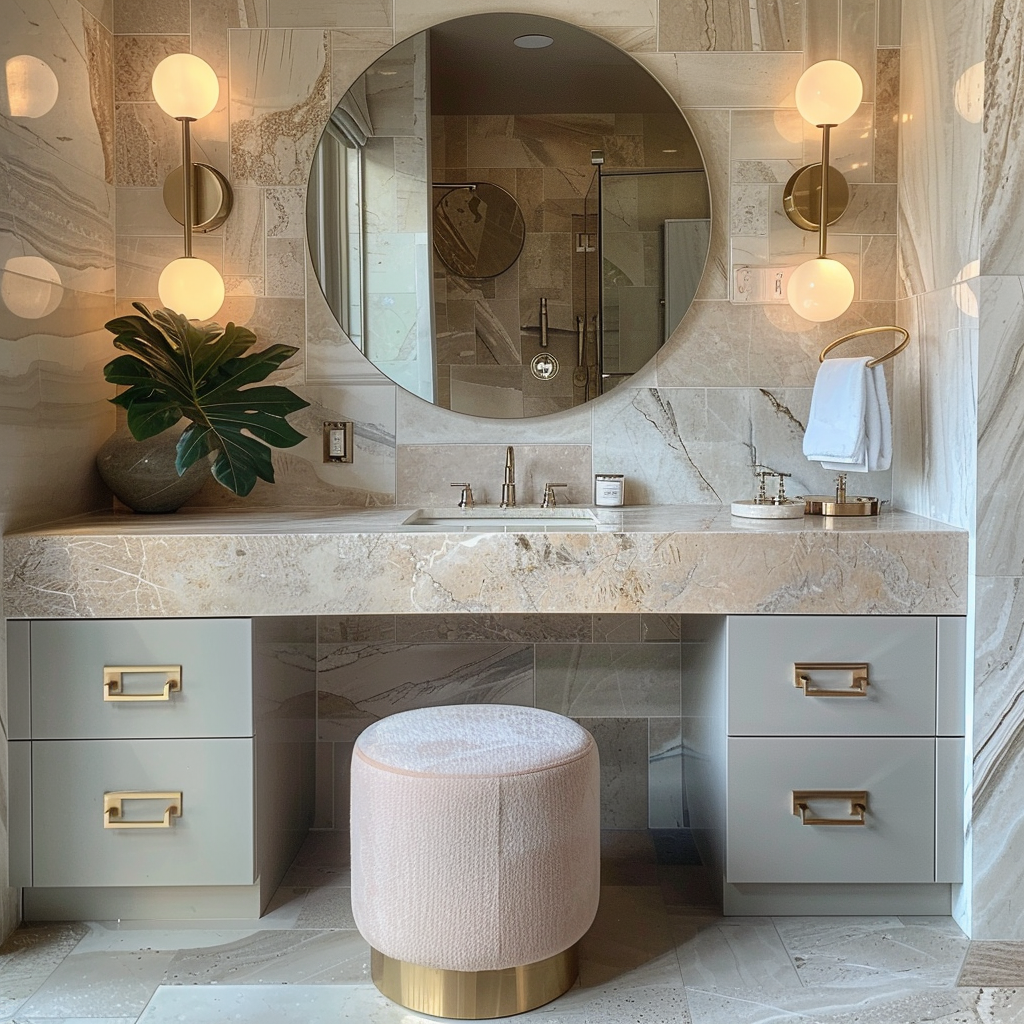
An AI IMAGE made with MidJourney using a description.
AI Image Platforms
MidJourney
Midjourney is a widely recognized AI tool that generates images from textual descriptions. This platform is particularly popular among artists, designers, and creatives for its ability to produce photorealistic and highly stylized conceptual images.
Key Features:
- Generates visually striking images from textual prompts.
- Offers a unique style that can be highly photorealistic
- Integrates with Discord, allowing for a community-driven experience where users can share prompts, images, and feedback.
- Also offers private chat with the Midjourney Bot
Pros & Cons:
- Pros: Highly detailed and stylized outputs; community-driven with constant updates; integrates seamlessly with Discord for easy collaboration.
- Cons: Requires familiarity with Discord; outputs can sometimes be unpredictable; limited control over specific details without precise prompts.
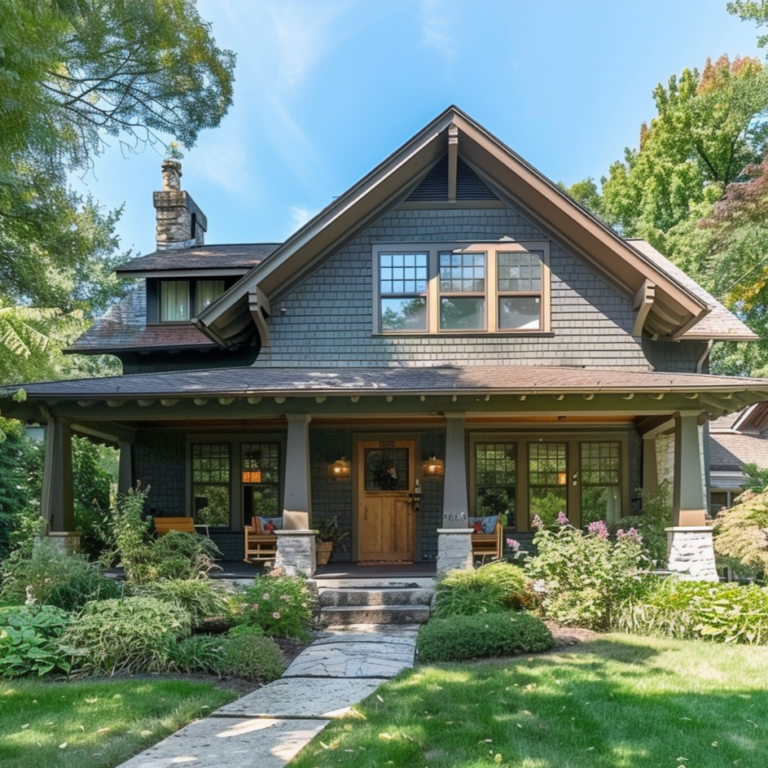
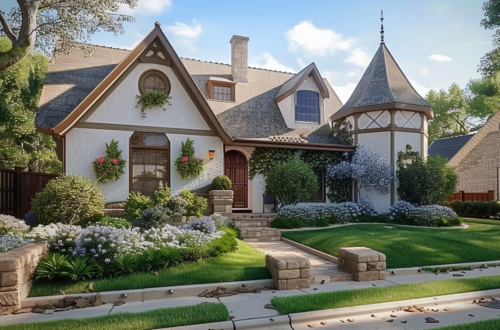
Midjourney Prompt: a street view photo of a craftsman style house
Dall-E
DALL·E, developed by OpenAI, is an AI program capable of creating images from textual descriptions. This tool has gained widespread attention for its ability to generate detailed and accurate representations of objects, scenarios, and concepts described in natural language.
Key Features:
- Can produce photorealistic images as well as stylized interpretations based on the prompts it receives.
- Offers the ability to modify existing images or create new ones from scratch.
- Excels in creativity, capable of combining unrelated concepts into coherent images that are both imaginative and visually appealing.
- Works as a chat to offer the ability to develop and refine images.
Pros & Cons:
- Pros: Direct integration with OpenAI’s suite of tools; highly customizable outputs with precise control over styles and elements; easy to use for those familiar with ChatGPT.
- Cons: May require a subscription for full access; generates a wide range of styles that may need refinement for specific projects.
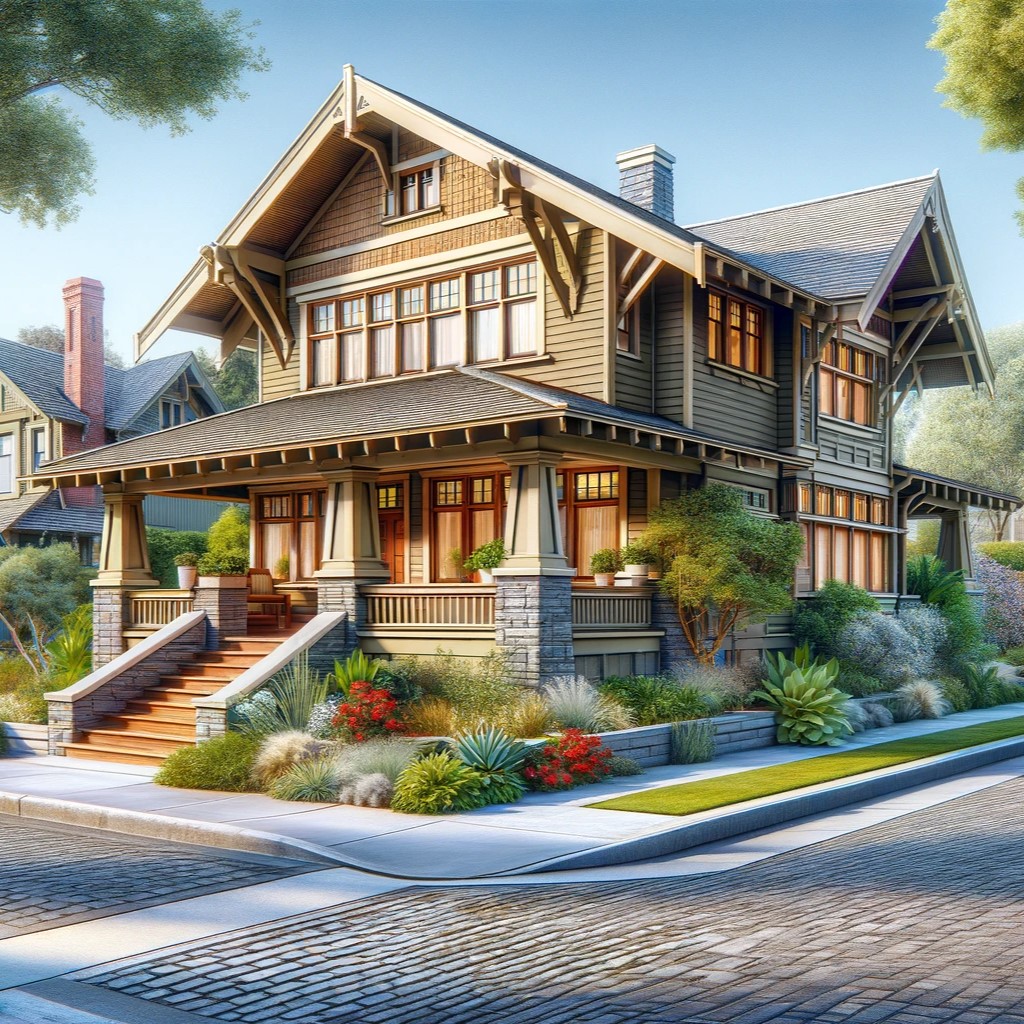
Dall-E Prompt: a street view photo of a craftsman style house
Stable Diffusion with ControlNet
Stable Diffusion with ControlNet is an advanced AI tool allowing users to input sketches or basic outlines, which the AI then uses as a guide to create detailed, high-quality images.
Key Features
- Allows for precise control over the outcome by using initial sketches or drawings as a base for the generated images.
- Suitable for tasks that require a higher degree of accuracy and detail, such as architectural renderings or product design visualizations.
- Offers the flexibility to create variations of a concept quickly, aiding in the exploration of different design options.
Pros & Cons:
- Pros: Accurate depictions of your designs
- Cons: Very advanced system, not for beginners.
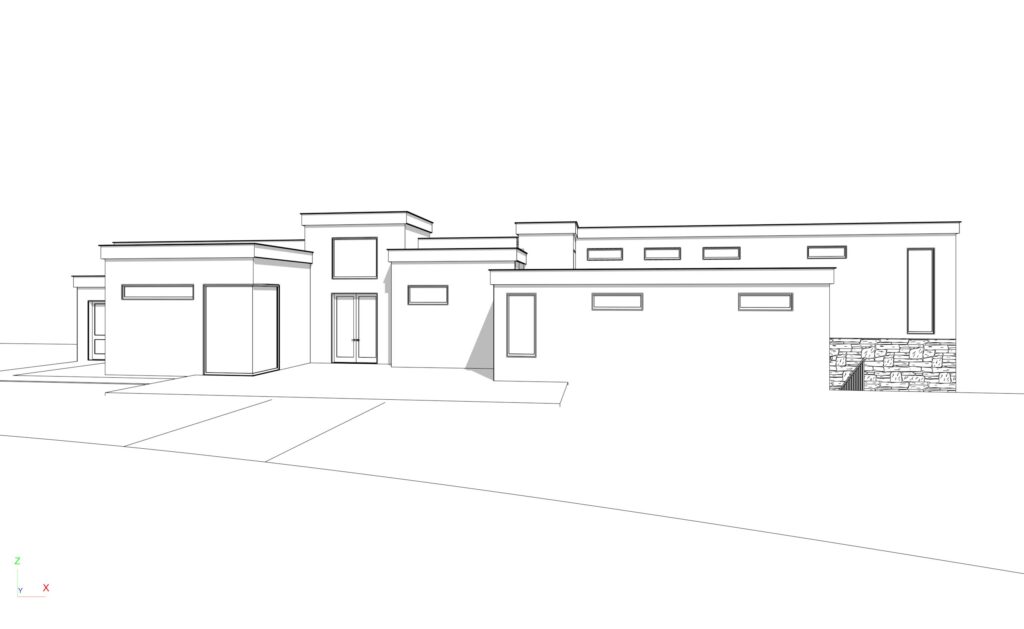

3d Model line drawing created in Chief Architect
AI Rendered images generated by Stable Diffusion
Stable Diffusion Prompt: modern style house, outdoors, sky, day, no humans, seaside, tropical, palm trees, photo realistic, super detailed, sharp focus
How To Use MidJourney
1. Join the Midjourney Discord Server: Midjourney operates within Discord, a platform that combines the features of a chat room, message board, and community space. Once your account is set up, join the Midjourney Discord server to access the tool and its community.
2. Navigate the Server: Familiarize yourself with the different channels within the Midjourney server. There are channels for announcements, general discussions, support, and, most importantly, image generation.
3. Start with the Basics: Look for a channel designated for new users or tests. These channels are less crowded, making them ideal for your first attempts at generating images with Midjourney.
4. Craft Your Prompt: The key to generating compelling images is a well-crafted prompt. Start simple. Describe what you want to see in a few words, like “sunset over the mountains” or “modern kitchen design.” As you become more comfortable, you can experiment with more detailed prompts that specify styles, emotions, or even specific elements you want to include.
5. Use the Command to Generate Images: Midjourney uses a simple command structure to process your prompts. The basic command format usually starts with /imagine followed by your prompt. Type your command into the message box at the bottom of the Discord channel and press Enter to submit.
6. Wait for Your Image: After submitting your prompt, Midjourney will process your request. This might take a few moments. Once done, it will post the generated images directly into the Discord channel.
7. Interact with Your Results: Midjourney allows you to refine or upscale your generated images. Beneath each set of images, you’ll find options to “Upscale” (for higher resolution) or “Variations” (to explore different takes on your prompt). Clicking these options triggers further processing.
8. Save Your Favorite Images: Once you have an image you’re satisfied with, you can save it directly from Discord. Right-click on the image and select “Save Image As…” to download it to your device.
9. Experiment and Learn: The best way to improve your skills with Midjourney is by experimenting with different prompts and observing the community’s creations. Don’t hesitate to ask for tips and feedback from fellow users.
10. Be Mindful of the Rules: Ensure you’re familiar with Midjourney’s guidelines and Discord’s community standards. Respectful interaction and creative exploration are key to making the most of your Midjourney experience.
Remember, creating stunning AI-generated images with Midjourney is a journey of exploration and learning. Embrace the process, and you’ll soon find yourself creating captivating visuals that bring your architectural and interior design visions to life.
How to Use Dall-E
1. Access DALL·E: Once your account is set up and you’ve chosen your subscription plan, log in to the OpenAI platform and navigate to the DALL·E section. This is where you’ll create your images.
2. Understand the Interface: Take a moment to familiarize yourself with the DALL·E user interface. You should see a simple, intuitive layout where you can enter your text prompts and view generated images.
3. Crafting Your Prompt: The magic of DALL·E lies in its ability to turn text into images. Start with a straightforward prompt that describes what you want to see, such as “a futuristic cityscape at dusk” or “a cozy reading nook in a modern apartment.” Keep it clear and concise.
4. Submitting Your Prompt: Once you’re happy with your prompt, enter it into the designated text box. DALL·E may offer options for style or detail level depending on the current version you’re using—select according to your preference.
5. Generating Your Image: After submitting your prompt, DALL·E will process your request. This process usually takes only a few seconds, but it can vary depending on server load and your subscription tier.
6. Interpreting Results: DALL·E will present you with a set of images based on your prompt. Take your time to review them and identify which ones best match your vision. The AI might offer surprising interpretations that could spark new ideas.
7. Refining and Editing: If DALL·E’s initial results aren’t quite what you envisioned, consider refining your prompt with more specific details or different phrasing. Some versions of DALL·E also allow for direct edits or variations on generated images.
8. Downloading and Using Your Images: Once you find an image you like, you can download it directly from the platform. Use these images in your design projects, presentations, or as inspiration for further creative exploration.
9. Experiment and Learn: The best way to get comfortable with DALL·E is to experiment. Try a variety of prompts to see how small changes can produce vastly different results. Over time, you’ll get a feel for how to craft prompts that yield the images you’re imagining.
10. Stay Informed: DALL·E is continually evolving, with new features and improvements being added. Stay updated on the latest developments by following OpenAI’s announcements and participating in community forums or discussions.
Using DALL·E effectively requires a mix of creativity, experimentation, and patience. As you become more familiar with the platform, you’ll discover unique ways to bring your architectural and interior design visions to life with AI-generated imagery. Remember, the journey is as rewarding as the destination, so enjoy the process of creating and learning with DALL·E.
How to Use Stable Diffusion
Stable Diffusion is a groundbreaking AI that transforms sketches into detailed images, enabling architects and designers to bring their visions to life. This is an advanced tool requiring a deeper understanding of AI learning and softwares.
- Upload Your Sketch: Begin by uploading your sketch or line drawing directly into the Stable Diffusion interface. This could be a hand-drawn sketch or one created in your preferred modeling software. This sketch acts as the foundation, helping the AI grasp the basic structure and concept of your design idea.
- Detail Your Vision: Accompany your sketch with a descriptive prompt that outlines your vision in detail. Mention the architectural styles, materials, lighting conditions, and any specific design elements you envision for the final image. The clarity and detail of your description significantly influence how closely the AI-generated image matches your initial concept.
- Customize with ControlNet: For sketches that contain intricate details you wish to preserve, such as specific furniture arrangements or architectural features, utilizing ControlNet is crucial. ControlNet allows you to select models tailored to maintain these details in the AI-generated image accurately. This step is essential for ensuring that the unique aspects of your design are reflected in the final visualization.
- Generate Your Image: Once your sketch is uploaded and your prompt is crafted, Click the generate button, and Stable Diffusion will begin the process of transforming your sketch and prompt into a comprehensive image. The AI utilizes your sketch as a baseline, enriching it with the details from your description to produce a fully realized image.
- Review and Refine: After generating your image, take the time to review it. If the outcome isn’t quite what you envisioned, consider refining your sketch or prompt with additional details or adjustments. This iterative process allows you to hone in on the exact result you’re aiming for.
Tips for Beginners
- Research and Learn: Given Stable Diffusion’s advanced capabilities, it’s beneficial to start with tutorials and resources tailored to beginners. Be sure to research to find the most recent version and tutorials.
- Experiment: Don’t be afraid to experiment with different prompts and settings. The learning process involves trial and error, and each attempt will provide valuable insights into how to better communicate your ideas to the AI.
- Seek Community Advice: Engaging with the Stable Diffusion community through forums or platforms like YouTube can offer practical advice and inspiration. For example, YouTube channels often publish advanced tutorials and tips that can help you understand how to leverage Stable Diffusion’s full potential.
While Stable Diffusion is indeed an advanced tool, its complexity should not deter beginners. Instead, view it as a platform that, with time and exploration, can significantly enhance your design process. By dedicating time to learn its intricacies and applying its capabilities to your work, you’ll find that Stable Diffusion opens up new avenues for creativity and innovation in architecture and interior design.
Crafting Effective Prompts
A Prompt is a command phrase that the image generator interprets to create an image. Prompts can be simple descriptive phrases or contain parameters and other pictures for comparison and styling.
Prompts for MidJourney
MidJourney Prompt structure: There are various ways to structure your prompts, depending on the outcome you’re wanting.
[Subject] —[Style] —[Modifiers/Parameters]
[Subject] [Background] [Additional Elements] [Effect] [Overall Composition]
[Subject]: This is the main focus of your image, what you want the AI to generate. It can be anything from “a traditional living room” to “Craftsman style house”
[Style]: Here, you specify the artistic style or the vibe you’re going for. This could be “in the style of Mid Century Modern” or “California Coastal.”
[Modifiers/Parameters]: These are additional options to refine your image, like “high detail,” “vibrant colors,” or specific instructions about the composition or elements to include/exclude. These will start with a dash dash.
Remember: Midjourney tends to prioritize the order of information in a prompt, giving more weight to elements presented earlier, which can influence the focus and overall direction of the generated image.
- Clarity and Detail: Begin with a clear, detailed description of the desired outcome. Specify architectural styles, color schemes, and any specific elements you want included.
Inspirational References: Incorporating references to well-known architectural styles or elements can guide the AI towards your vision.
Iterative Approach: Experiment with variations in your prompts to refine the outputs, using Midjourney’s options to adjust and iterate on designs.
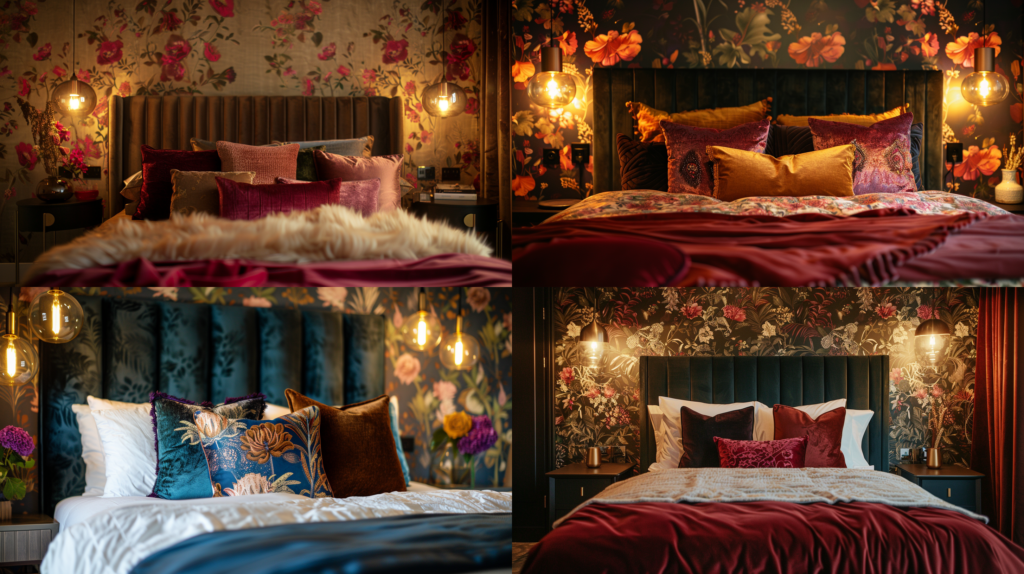
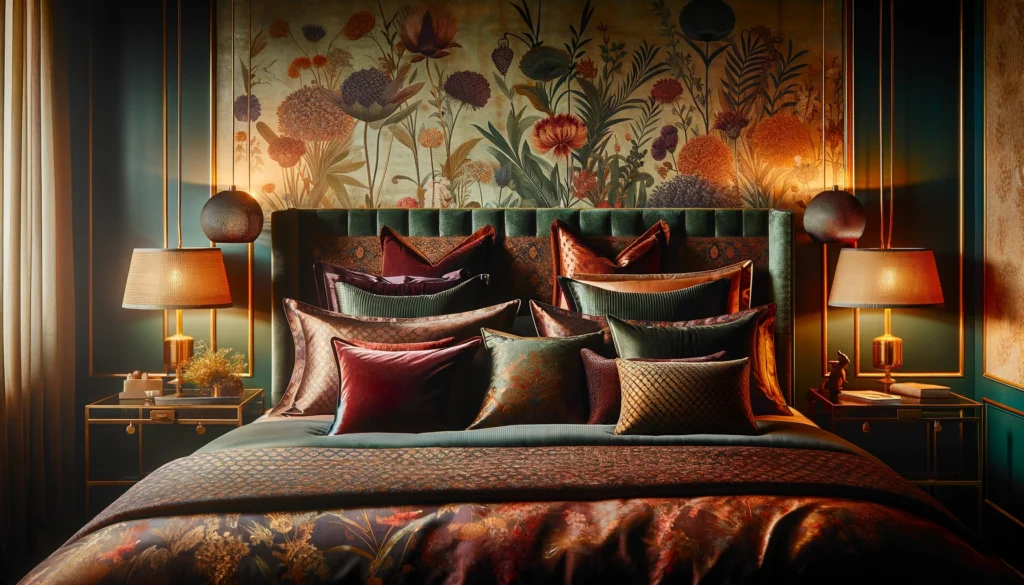
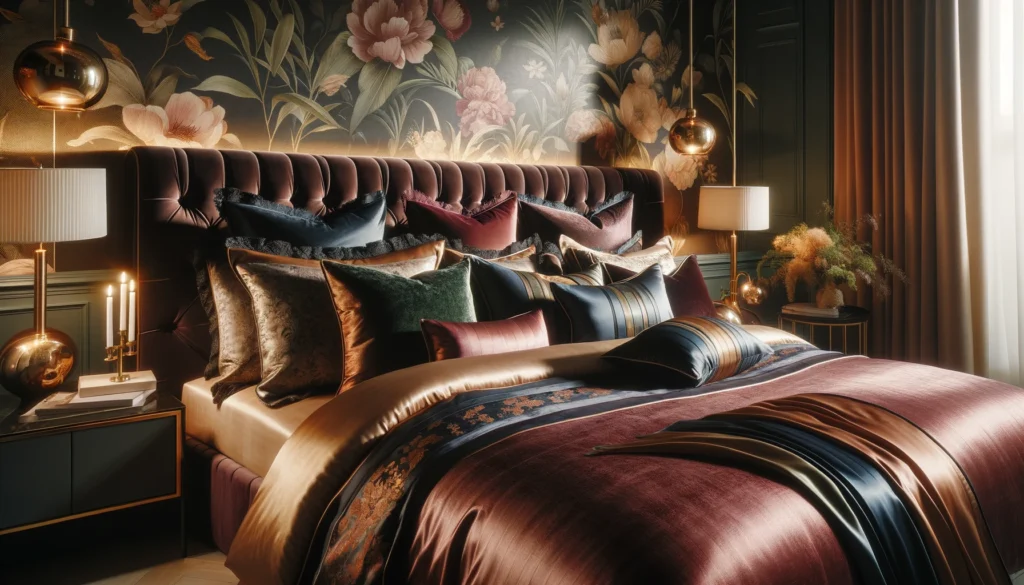
Prompt: a king sized bed with silk and velvet bedding in rich jewel tones. There is botanical wallpaper on the wall behind the headboard. The focus is on the pillows and upholstered headboard. There are pendant lights hanging over bedside tables on each side of the bed. Golden hour effect. –ar 16:9
Prompts for Dall-E
DALL·E Prompt Structure:
[Subject] in [style or setting], with [specific attributes/context]
The basic prompt structure for creating images in DALL·E involves a detailed description that combines the subject, style, and specific attributes or context you want the image to reflect, formatted as a single, coherent description:
DALL·E can develop images through conversational chat by iteratively refining and generating visuals based on detailed feedback and adjustments provided in user prompts over the course of the conversation.
Precision in Language: Use precise, descriptive language to guide the AI. The more detailed your prompt, the more accurate the image.
Contextual Information: Include information about the purpose of the space, the mood you aim to evoke, and any specific design elements or materials.
Experimentation: DALL·E offers the chance to explore different artistic styles or unreal combinations, so don’t hesitate to experiment with creative and unconventional prompts.
Prompt: a king sized bed with silk and velvet bedding in rich jewel tones. There is botanical wallpaper on the wall behind the headboard. The focus is on the pillows and upholstered headboard. There are pendant lights hanging over bedside tables on each side of the bed. Golden hour effect.
Prompts for Stable Diffusion
Stable Diffusion Prompts:
Be Specific: Clearly describe what you want, including subject, style, and any important details.
Artistic Influence: Mention any specific artistic styles or effects you’d like to see.
Use Sketches: For Stable Diffusion with ControlNet, include a simple sketch to guide the AI.
Experiment: Try different variations of your prompt to see how small changes affect the outcome.
Review and Refine: Analyze the generated images and refine your prompts based on what you learn.
Getting Started with AI Tools: A Smooth Onboarding Process
These tools can be surprisingly easy to adopt. For designers and architects looking to integrate AI into their workflow, the journey from beginner to proficient user has never been more accessible. Here’s how easy it is to get started and stay current with AI tools:
Ease of Onboarding:
User-Friendly Interfaces: Many AI tools, including Midjourney, DALL·E, and Stable Diffusion with ControlNet, boast intuitive interfaces that simplify the learning curve. These platforms often provide guided tutorials, comprehensive FAQs, and community forums that help new users navigate the basics effectively.
Accessible Learning Resources: There is a wealth of free online resources available, ranging from video tutorials on YouTube to detailed articles specifically designed for designers and architects. These resources cover everything from setting up accounts to crafting effective prompts, ensuring users can quickly become proficient.
Trial and Experimentation: AI tools encourage experimentation, allowing users to learn by doing. The ability to generate images with simple text prompts means that even those with minimal technical skills can start producing results immediately, refining their approach as they gain more experience.
For each of these platforms, it’s essential to review any available documentation or tutorials provided to maximize your understanding and use of the AI tools effectively. Remember, the creative possibilities these platforms offer are vast, so don’t hesitate to explore and experiment with different prompts and settings.
Setting up Accounts
Midjourney Account Setup
- Join Discord: Midjourney operates within Discord, a popular communication platform. If you don’t already have a Discord account, visit Discord’s website to sign up. You’ll need to provide an email address, create a username, and set a password. Here’s how to set it up: https://support.discord.com/hc/en-us/articles/360033931551-Getting-Started
- Access Midjourney: Once your Discord account is ready, find the Midjourney Discord server here: https://discord.com/invite/midjourney.
- Follow Onboarding Instructions: The Midjourney server will have specific channels set up for new users. Follow the onboarding instructions provided to activate your Midjourney access. You’ll need the basic $10 per month account in order to use it. https://docs.midjourney.com/docs/quick-start
DALL·E Account Setup
Sign Up at OpenAI: Visit the OpenAI website and create a PLUS account for $20 per month. This will give you access to OpenAI’s suite of tools, including DALL·E for images as well as all of ChatGPT’s advanced tools. (Well worth it!)
Access DALL·E: Once your OpenAI account is set up, navigate to DALL·E by clicking on Explore GPTs in the left menu.
Stable Diffusion with ControlNet Account Setup
*This is an advanced system requiring deeper knowledge of computer systems. I will go over this in general, but I suggest searching YouTube for the most current tutorials, as it is ever changing.
After setting up Stable Diffusion with ControlNet, you can upload a sketch of your design idea. This could be anything from a rough layout of a room to a detailed facade of a building, then use the system to create a rendered image from your exact sketch.
1. Start with the Basics: First, you’ll need Stable Diffusion on your computer. You’ll need to research the most recent version and instructions. This is an advanced system, not for beginners. I’ve included a video by another creator here that explains the process in very easy terms.
2. Add ControlNet for More Control: ControlNet is an add-on for Stable Diffusion that gives you more control over the images you create, especially if you want to work with your existing designs and control the output.
Ethics and AI-Generated Images in Architecture and Interior Design
The use of artificial intelligence (AI) in creating images for architecture and interior design introduces a myriad of possibilities for creativity and innovation. However, it also brings ethical considerations to the forefront, particularly regarding transparency and representation. As professionals in the field increasingly turn to AI tools like Midjourney, DALL·E, and Stable Diffusion with ControlNet, ethical guidelines become crucial.
Transparency with AI Usage
It’s essential to be transparent about the use of AI in generating images. When presenting AI-generated visuals to clients or sharing them online, it’s important to clearly disclose that these images are the product of artificial intelligence. This transparency ensures that clients and the public are fully informed about the nature of the work they’re viewing.
Clarifying the Nature of AI Images
AI-generated images are not photographs of real places, nor are they designs that have been physically built. They represent potential ideas that could be realized in the future. It’s important to communicate this distinction to avoid any misconceptions about the feasibility or current existence of the designs presented.
Ethical Sharing and Representation
When posting AI-generated images online or sharing them with clients, always disclose that the images are AI-generated. This honesty is crucial in maintaining trust and integrity within the professional community and with clients. Attempting to pass off AI-generated images as real photos or as actual completed projects can lead to misunderstandings about your capabilities and the authenticity of your portfolio.
Never Misrepresent Abilities
The use of AI should not be seen as a way to exaggerate or misrepresent one’s design abilities. Instead, it should be viewed as a tool to enhance the design process, allowing for the exploration of ideas and concepts that might not be possible to visualize otherwise. The goal should always be to use AI ethically to support your genuine skills and expertise, not to deceive or mislead clients about what has been or can be achieved.
Embracing AI for a Competitive Edge
The future of interior design is closely tied to the integration of AI, with expectations for even more advanced applications in space planning, personalized design recommendations, and client engagement. As AI continues to evolve, designers equipped with these tools can expect to deliver more innovative, functional, and personalized projects that resonate with clients’ needs and preferences.
10 Ways to Use AI Image Creation for Designers
Incorporating AI image creation into the workflow of designers and architects represents a paradigm shift in how concepts are visualized and communicated. This integration can enhance creativity, efficiency, and client engagement in several key ways.
READ MORE

Since 2022, I’ve been teaching designers how to use AI and explore the metaverse, making tech in design easier to grasp. I focus on practical tools like Midjourney and DALL·E, helping creatives bring their ideas to life with new tech. My goal is to make learning about these advances straightforward and inspiring for everyone in the design community.
